因为该方法是异步,因此无法准确知道元素的执行顺序。
有可能axios方法后面的方法会提前执行,也有可能会延后执行。
1 2 3 4 5 6 7 8 9 var _this = this var _data = this .$dataaxios.get(main.requestAddress + '/book/showAllBooks' , { params : {'pn' : _data.queryParams.currentPageNum} }).then(function (response ) }).catch(function (error ) });
params:{ ‘data’: data} 是指以键值对的方式 往后台传输数据
因此,后台需要用@RequestParam()标签
注意,在main.js中定义一个变量 var requestAddress=”192.xxx.xxx.xxx”
同时导出这个main.js
最后使用的时候记得 import main from ‘main.js的路径’
使用axios请求时,如果需要用到在回调函数中用到该网页的内容。
必须在axios.get/post方法外 定义一个
注意外面的this与回调函数的this不一样!!!
POST方法比较复杂,涉及到数据绑定
1 2 3 4 5 6 7 8 9 10 11 12 13 14 15 16 17 18 19 20 21 22 23 24 25 26 <el-form :rules="loginFormRules" ref="loginForm" :model="loginForm" label-position="right" label-width="auto" show-message> <span class ="login-title" > 欢迎登录</span > <div style ="margin-top: 5px" > </div > <el-form-item label ="用户名" prop ="username" > <el-col :span ="22" > <el-input type ="text" v-model ="loginForm.username" > </el-input > </el-col > </el-form-item > <el-form-item label ="密码" prop ="password" > <el-col :span ="22" > <el-input type ="password" v-model ="loginForm.password" > </el-input > </el-col > </el-form-item > <el-form-item > <el-button type ="primary" @click ="loginSubmit('loginForm')" > 登录</el-button > <el-button type ="primary" @click ="dialogVisible=true" > 注册</el-button > </el-form-item > </el-form>
ref=”loginForm” 与 :model=”loginForm” 都是指绑定data中的loginForm
rules=”loginFormRules” 指的是绑定自定义规则
v-model=”loginForm.username”指的是 该值双向绑定loginForm里面的username属性 因此,一定记得prop=loginForm.prop
点击登录按钮时,loginForm 作为参数传进去!
1. loginForm里面的参数->对应的所有prop
写在return 里面即可:
1 2 3 4 loginForm: { username : '' , password : '' }
2. loginForm对应的规则,也写在return里面
1 2 3 4 5 6 7 8 loginFormRules: { username :[ {required : true , message : '账号不可为空' , trigger : 'blur' } ], password : [ {required : true , message : '密码不可为空' , trigger : 'blur' } ] }
require表示必须填,触发blur后,会提示message!
这样,在JS中,可以将该表单loginForm 与它对应的参数输入规则 绑定在一起验证!
同时也可以自定义验证规则!在data(){这里} 中写
1 2 3 4 5 6 7 const validateUserName = (rule, value, callback ) => { if (value === 0 ){ callback(new Error ('这里是错误提示' )) }else { callback() } }
其中value是对应输入框的值!
callback用来回调
提示对方错误信息
还是
让对方通过
这样的话,可以在规则中,声明走自定义的规则方法:
1 2 3 4 5 loginFormRules: { username :[ {required : true , validator : validateUserName,, trigger: 'blur' } ] }
其他自定义规则 看官方文档
具体登录+验证方法如下:
1 2 3 4 5 6 7 8 9 10 11 12 13 14 15 16 17 18 19 20 21 22 23 24 25 26 loginSubmit (formName ) let _this = this this .$refs[formName].validate((valid ) => { if (valid) { this .$axios.post(main.requestAddress + `/user/login` , _this.loginForm) .then(res => _this.$data.message = res.data.message if (res.data.data === null ) { _this.openLoginFailMessage(); return ; } sessionStorage.setItem("token" , true ); sessionStorage.setItem("username" , res.data.data.username); _this.$router.push("/index" ); }) .catch(Error => console .log(Error ) }) } else { return false ; } }); }
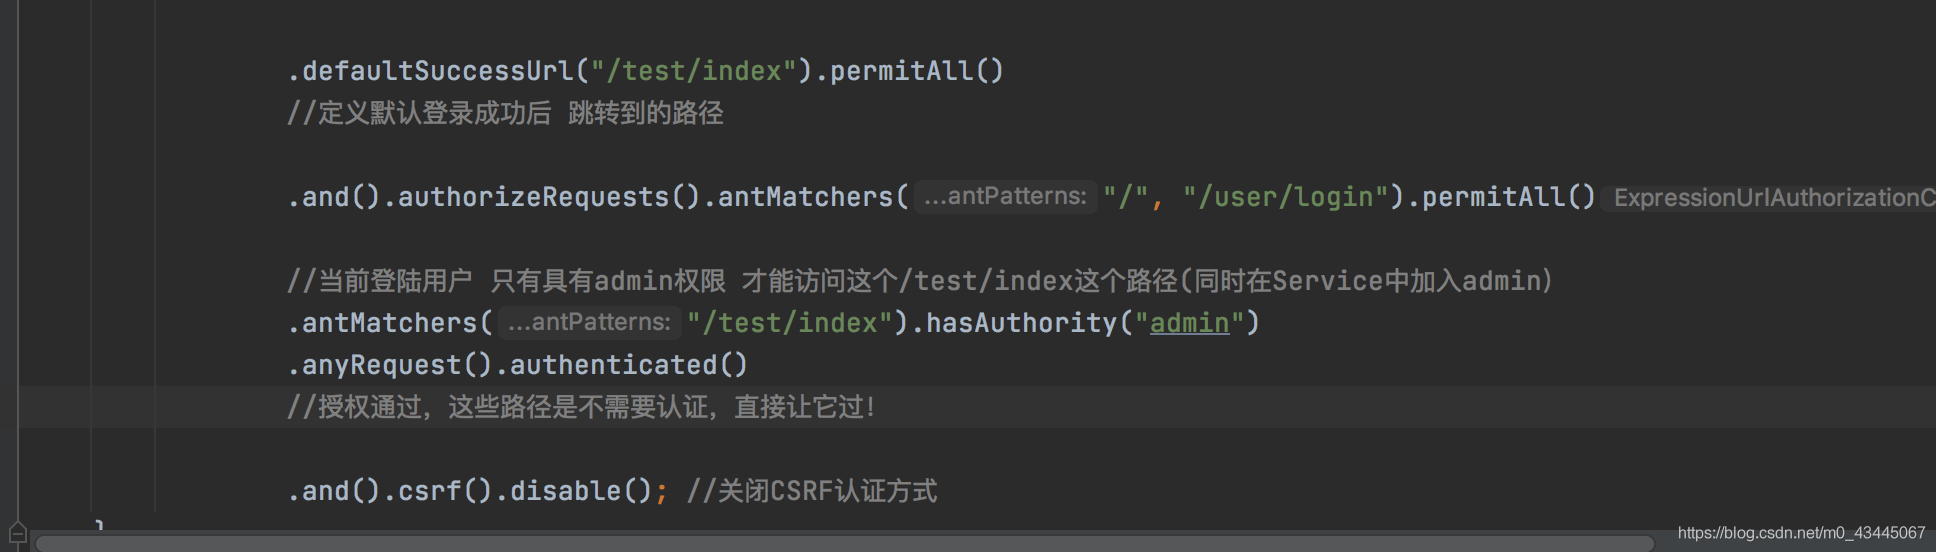
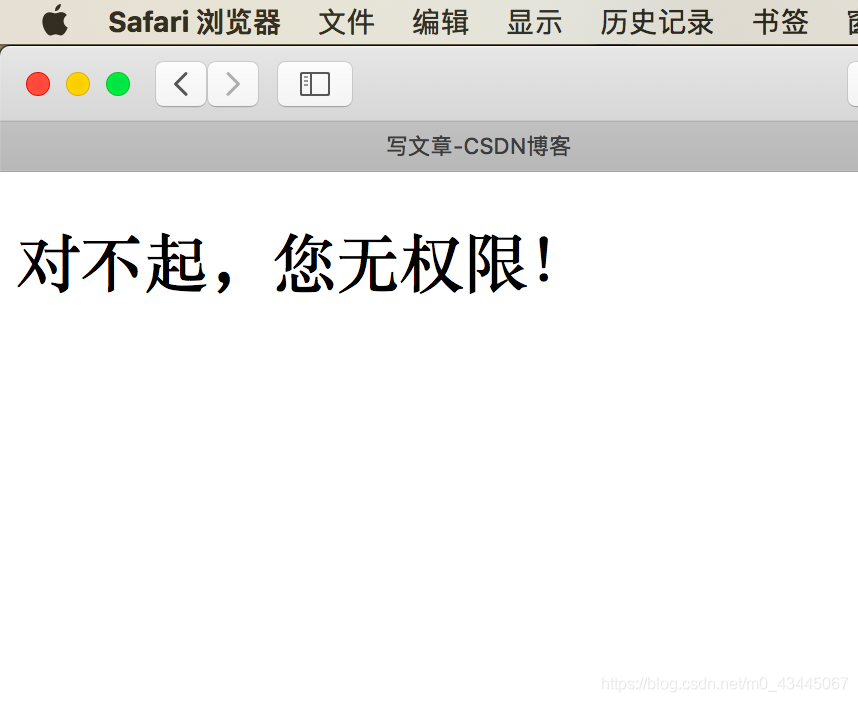
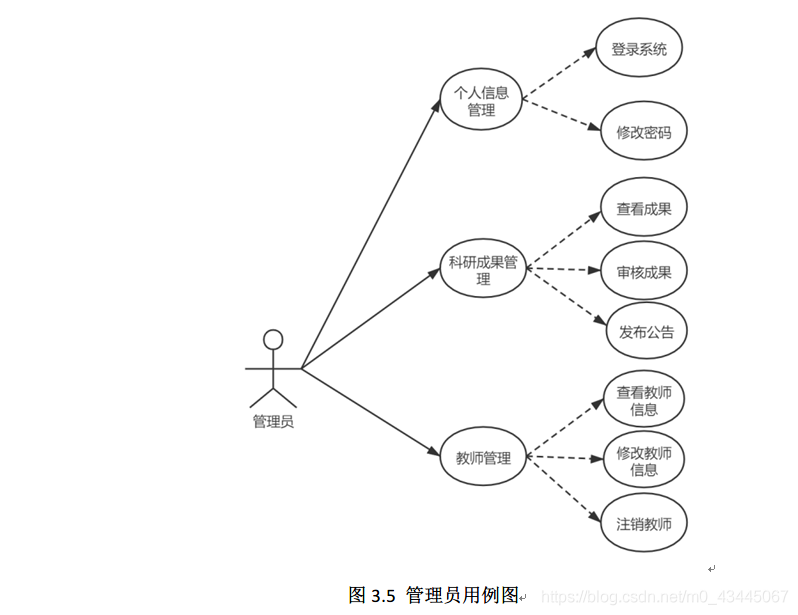
1.首先搞清楚,除了登录、404..页面,其他的涉及到必须要先登录的业务数据页面 都是要授权认证的!
2.授权认证,必须要经过成功登录
3.每次页面进行跳转都要经过权限认证过程!
我们给相应涉及业务数据的页面,比如主页面index,加上需要拦截的头信息:
注意!登录页面是不需要加的!
1 2 3 4 5 6 7 8 { meta : { requireAuth : true }, path : '/index' , name : '业务逻辑' , component : ()=> import ('../views/ShowAll' ) }
然后,在页面拦截时,我们需要判断要去的页面是否需要授权?
也就是requireAuth是否是’true’?
1 2 3 4 5 6 7 8 9 10 11 12 13 14 15 16 17 18 19 20 21 router.beforeEach((to, from , next ) => { if (to.meta.requireAuth) { if (sessionStorage.getItem("token" ) == 'true' ) { next(); } else { alert('请您登陆...' ); next({ path : '/login' }) } } else { if (sessionStorage.getItem("token" ) == 'true' && to.path != '/login' ) { next('/index' ) } else { next() } } })
注意这里的sessionStorage.getItem(“token”)取出来的值是 字符串类型
这里的 && to.path!=’/login’ 是用户从index主界面 到login登录页面 而不想已经验证但还是跳到index页面的情况
如果不指定
即指定去登录页面(前提是登录页面的path是’/login’) ,
那么next()就代表允许去想要去的页面
因为每次我们要看sessionStorage.getItem(“token”)里面值是不是’true’。因此,我们需要在登录成功的时候!添加对应的 token 信息
1 sessionStorage.setItem("token" , true );
如果在菜单中不想让某些通用模块出现(比如登录、注册、注销等功能)
可以在对应路由信息中,添加属性: hidden: true
在页面中的el-submenu 以及el-submenu-item中 去for循环遍历时,加一个v-if=”!item.hidden”
注意,v-if 与 v-for 是不能同时出现在属性中 可以将v-for 提前一个标签!
通常,我们通过vue/cli来创建相应的vue项目
注意,如果不想要VUE严格的eslint语法规则。
可以在创建的时候,取消勾选Fomatter。
若需要VUEX全局状态管理,可以勾选。
若需要路由router,则可以选择勾选。
…在经过漫长的cmd后
不用关闭当前git bash 或者命令行控制工具Command
我们首先进入这个项目,直接利用npm配置一些插件。
1 2 3 4 cd vue_demo vue add vuetify vue add element vue add axios
不出意外的话,在具体的项目目录中,可以看到多出一个文件夹plugins。
这里装着我们安装进去的插件。
在配置之后,我们可以用VS code来打开这个文件夹,并且
运行项目
1 npm install echarts --save
如果npm的安装速度较慢,可以使用cnpm淘宝镜像
1 2 3 4 5 6 npm install -g cnpm --registry=https: cnpm install echarts -S
当完成npm安装后,echarts插件出现在 node_modules 目录下
main.js 文件
1 2 3 4 import * as echarts from 'echarts' Vue.prototype.$echarts = echarts
1 <div ref ="chartColumn" style ="{width: '300px', height: '300px'}" > </div >
ref属性是为了JS代码中能引用这个图表
<div>属性之间默认隔行 如果想要多个图表在同一行中显示 添加属性:style="display: inline-block"
如果想要动态改变 图表的高度与宽度 可以利用VUE的动态绑定
将画图抽象成一个函数 drawLine() 这个函数放在mounted() 生命周期函数中
图标参数JSON数据 (定义在data中的return{})
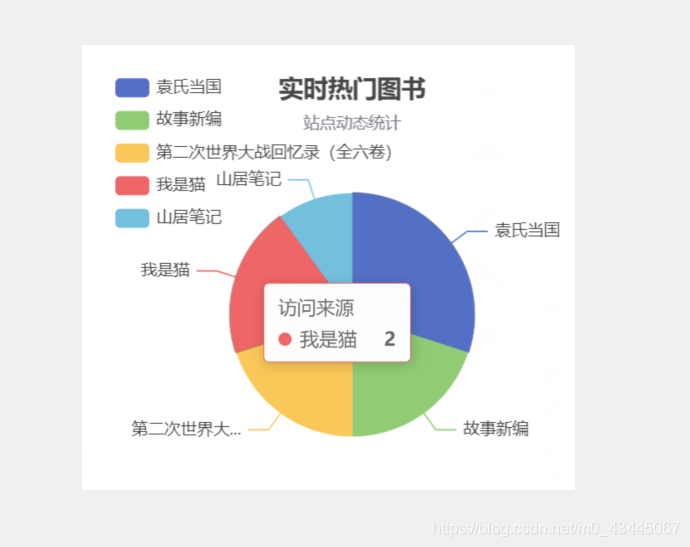
1 2 3 4 5 6 7 8 9 10 11 12 13 14 15 16 17 18 19 20 21 22 23 24 25 26 27 28 29 optionCircle:{ title : { text : '实时热门图书' , subtext : '站点动态统计' , left : 'center' }, tooltip : { trigger : 'item' }, legend : { orient : 'vertical' , left : 'left' , }, series : [ { name : '访问来源' , type : 'pie' , radius : '50%' , data : [], emphasis : { itemStyle : { shadowBlur : 10 , shadowOffsetX : 0 , shadowColor : 'rgba(0, 0, 0, 0.5)' } } } ] }
正常情况下,是看不到任何数据的 但是能看到你的饼状图标题
接下来,我们要在data中从后台动态添加数据
这里我选择 AXIOS 异步刷新数据
JS drawLine() 函数
1 2 3 4 5 6 7 8 9 10 11 12 13 14 15 16 17 18 19 20 21 22 23 24 25 drawLine ( let myChartCircle = this .$echarts.init(this .$refs.chartCircle); const _this = this axios.get( main.requestAddress + '/book/showPopularBooks' ).then(function (response ) let list = response.data.data let data = _this.$data.optionCircle.series[0 ].data for (let i =0 ; i<list.length; i++){ data.push({ name : list[i].bookname, value : list[i].borrowNum }) } myChartCircle.setOption(_this.$data.optionCircle); }).catch(function (error ) alert(error); }); }
可以看到,其实真正的饼状图数据是:
“name”代表饼图的名称 “value”代表对应name的饼图数据
值得注意的是,这种push方法是加入新的JSON对象的方法
1 2 3 4 5 data.push({ key1 : value1(可以来自后台), key2 : value2(可以来自后台), ... });
效果图如下:
与饼状图相似,先是配置图标参数,渲染图表,最后是取数据
1 2 3 4 5 6 7 8 9 10 11 12 13 14 15 16 17 18 optionColumn:{ title : { text : '实时借书用户' }, tooltip : { }, legend : { }, xAxis : { data : [] }, yAxis : {}, series : [{ name : '借阅次数' , type : 'bar' , data : [] }] }
1 2 3 4 5 6 7 8 9 10 11 12 13 14 15 16 17 18 let myChartColumn = this .$echarts.init(this .$refs.chartColumn) axios.get( main.requestAddress + '/book/showPopularUsers' ).then(function (response ) let list = response.data.data let nameArray = _this.$data.optionColumn.xAxis.data let numArray = _this.$data.optionColumn.series[0 ].data for (let i=0 ; i<list.length; i++){ nameArray.push(list[i].username); numArray.push(list[i].totalBorrowNum); } myChartColumn.setOption(_this.$data.optionColumn); }).catch(function (error ) alert(error); });
可以看到,对于柱状图,我们要配置两个
xAxis 即X轴的数组中的数据
series[0]中的data数组 代表从左往右依次的 棱柱所代表的value
效果图如下
在VUE中,如果有些数据我们不太需要后台频繁的查询数据
我们就可以将这些数据存放在VUEX中
1 2 3 4 5 6 7 8 9 10 11 12 13 14 15 16 17 18 19 20 21 22 23 24 25 import Vue from 'vue' import Vuex from 'vuex' Vue.use(Vuex) export default new Vuex.Store({ state :{ viewCounter = 1 }, mutations :{ setViewCounter (state, viewCounter ) state.viewCounter = viewCounter } }, getters :{ getViewCounter : state => }, action :{}, modules :{} })
1 this .$store.getters.getViewCounter
1 this .$store.commit('setViewCounter' , newValue);
在这种类型的项目中,我们需要在相应的Spring MVC.xml配置文件中,去配置一个Bean
代码如下:
1 2 3 4 5 <bean id ="multipartResolver" class ="org.springframework.web.multipart.commons.CommonsMultipartResolver" > <property name ="maxUploadSize" value ="104857600" /> <property name ="maxInMemorySize" value ="4096" /> <property name ="defaultEncoding" value ="UTF-8" > </property > </bean >
这种,我们就可以在Controller层中,使用@RequestParam(“file”) MultipartFile file了。
如果前端是Form表单的话,则前端代码如下:
1 2 3 4 5 <form class ="form-horizontal " action ="/UploadServlet" id ="upload" enctype ="multipart/form-data" method ="post" > <input class ="form-control" type ="file" > <button type ="submit" class ="btn btn-success btn-sm" > 上传</button > <div > ${ message } </div > </form >
这样,当我们点击上传后,即会跳转到对应的action,我们用@PostMapping来接收即可。
后台代码如下:
1 2 3 4 5 6 7 8 9 10 11 12 13 14 15 16 17 18 19 20 21 22 23 24 25 26 27 28 29 30 31 32 33 34 35 36 37 38 39 40 41 42 43 44 45 46 47 48 49 50 51 52 53 54 55 56 57 58 59 60 61 62 63 64 65 66 67 68 69 70 71 private static final String UPLOAD_DIRECTORY = "upload" ; private static final int MEMORY_THRESHOLD = 1024 * 1024 * 3 ; private static final int MAX_FILE_SIZE = 1024 * 1024 * 40 ; private static final int MAX_REQUEST_SIZE = 1024 * 1024 * 50 ; @RequestMapping(value = "/UploadServlet", method = RequestMethod.POST) public String upload ( ModelAndView modelAndView, HttpServletRequest request, HttpServletResponse response) throws IOException, ServletException DiskFileItemFactory factory = new DiskFileItemFactory(); factory.setSizeThreshold(MEMORY_THRESHOLD); factory.setRepository(new File(System.getProperty("java.io.tmpdir" ))); ServletFileUpload upload = new ServletFileUpload(factory); upload.setFileSizeMax(MAX_FILE_SIZE); upload.setSizeMax(MAX_REQUEST_SIZE); upload.setHeaderEncoding("UTF-8" ); String uploadPath = request.getServletContext().getRealPath("./" ) + File.separator + UPLOAD_DIRECTORY; File uploadDir = new File(uploadPath); if (!uploadDir.exists()) { uploadDir.mkdir(); } try { List<FileItem> formItems = upload.parseRequest(request); if (formItems != null && formItems.size() > 0 ) { for (FileItem item : formItems) { if (!item.isFormField()) { String fileName = new File(item.getName()).getName(); String filePath = uploadPath + File.separator + fileName; File storeFile = new File(filePath); String filePathSaved = uploadPath + File.separator; item.write(storeFile); teacherServer.saveFilePath(filePathSaved, fileName); request.setAttribute("message" , formItems.get(0 ).getName() + "文件上传成功!" ); } } } } catch (Exception ex) { request.setAttribute("message" , "错误信息: " + "文件上传失败,请检查是否文件为空!" ); } return "/teacher/tea_add_paper" ; }
注意到return这里,我们需要配置相应的视图解析器,不然我们不知道return哪个地方去显示。
1 2 3 4 5 <bean class = "org.springframework.web.servlet.view.InternalResourceViewResolver" > <property name ="prefix" value ="/" > </property > <property name ="suffix" value =".jsp" > </property > </bean >
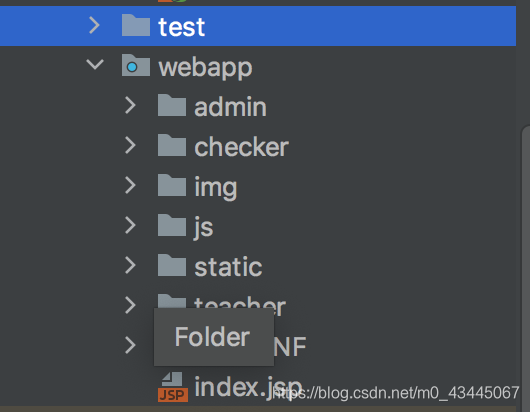
注意:webapp 就是我们配置的根目录,并且配置的视图后缀为.jsp
这样我们就能在,相应的视图中,看到message的内容了
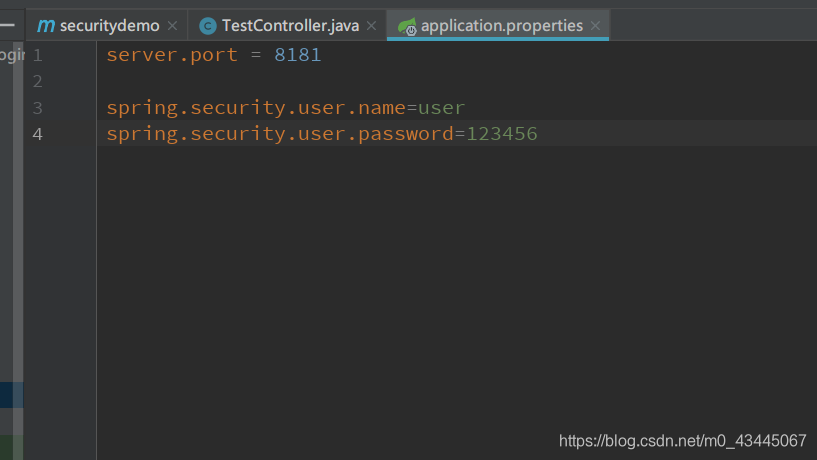
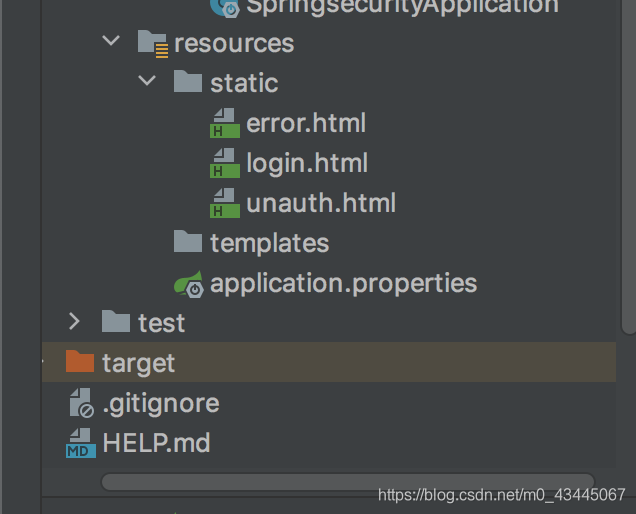
首先,我们需要在SpringBoot的配置文件application.yml或者application.properties中配置:
application.properties
1 2 3 spring.servlet.multipart.max-request-size=10MB spring.servlet.multipart.max-file-size=10MB
然后我们,在controller中写相应语句:
我们仍然需要配置视图解析器ViewResolver:
在application.properties中:
1 2 3 spring.mvc.view.prefix=/ spring.mvc.view.suffix=.jsp
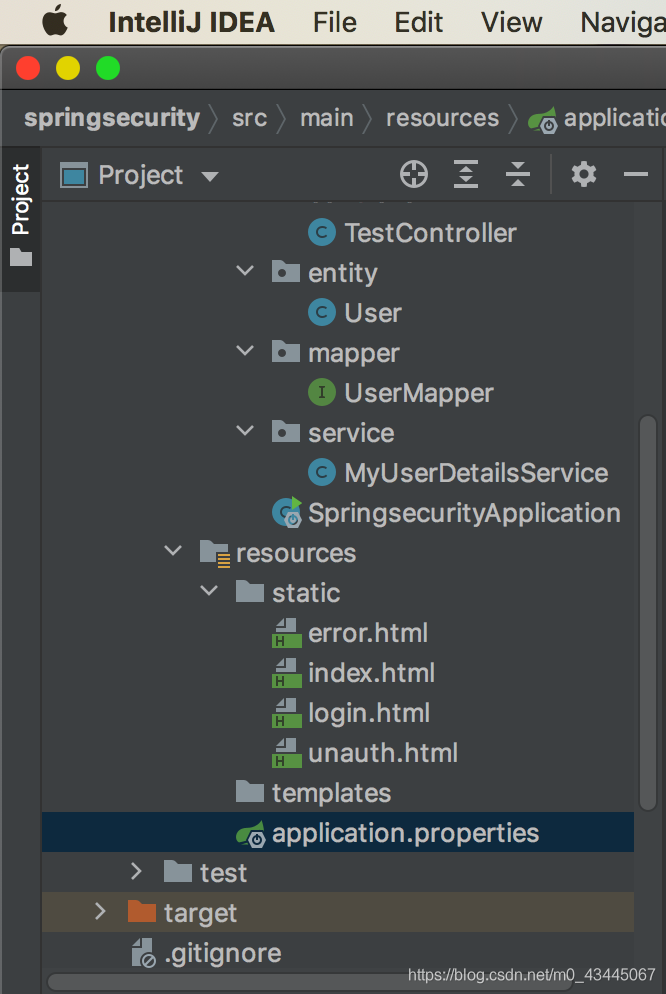
仍与上方图片中的项目结构图一致!
1 2 3 4 5 6 7 8 9 10 11 12 13 14 15 16 17 18 19 20 21 22 23 24 25 26 private static final String UPLOAD_DIRECTORY = "upload" ; @PostMapping("/upload") @ResponseBody public String upload (@RequestParam("file") MultipartFile file, HttpServletRequest request) if (file.isEmpty()) { request.setAttribute("message" , "对不起,检测到文件为空!" ); return "/teacher/tea_add_paper" ; } String fileName = file.getOriginalFilename(); String templatePath = request.getServletContext().getRealPath("./" ) + File.separator + UPLOAD_DIRECTORY; File dest = new File(filePath + fileName); try { file.transferTo(dest); request.setAttribute("message" , "文件上传成功!" ); return "/teacher/tea_add_paper" ; } catch (IOException e) { System.out.println(e) } request.setAttribute("message" , "文件上传失败!" ); return "/teacher/tea_add_paper" ; }
接下来,就准备写前端页面请求:
1 2 3 4 5 6 7 8 <form method ="post" action ="/uploading" enctype ="multipart/form-data" > <input type ="file" name ="file" > <br /> <input type ="submit" value ="提交给服务器" > <div > ${message} </div > </form >
前提是解决跨域问题,并且直接通过IP地址访问,将这个访问的ip地址存在VUEX中或者Main.js中即可。
1. VUE前端页面
1 2 3 4 5 6 7 8 9 10 11 12 13 14 15 16 17 18 19 20 21 22 23 24 <el-upload class ="uploadDemo" ref ="upload" accept =".doc" action ="https://jsonplaceholder.typicode.com/posts/" :on-preview ="handlePreview" :on-remove ="handleRemove" :http-request ="httpRequest" :auto-upload ="false" > <el-button slot ="trigger" size ="small" type ="primary" > 选取文件</el-button > <el-button style ="margin-left: 10px" size ="small" type ="success" @click ="submitUpload" > 上传到服务器</el-button > <div slot ="tip" class ="el-upload__tip" > 只能上传.doc后缀文件,且不超过40MB </div > </el-upload >
写两个函数
一个是按钮点击函数,另一个是上传文件的表单具体提交(axios请求)的函数
提交按钮函数1 2 3 submitUpload ( this .$refs.upload.submit(); },
注意,我们这里看到他的action位置,并不是我们的后台地址。
也就是说,我们通过先把自己的文件传给他的action,再由他的action服务器地址,传给我们的后台服务器。
最后,提交表单后,会走绑定属性httpRequest的方法,即:
表单提交函数1 2 3 4 5 6 7 8 9 10 11 12 13 14 15 16 17 18 19 20 21 22 23 24 25 26 27 28 29 httpRequest (param ) let fileObj = param.file; let data = new FormData(); data.append("file" , fileObj); const config = { headers : { "Content-Type" : "multipart/form-data" } }; var _this = this ; this .$axios .post( this .$store.getters.getRequestAddress + `/uploading` , data, config ) .then((res ) => { let data = res.data; console .log(data); if (data.data === 1 ) { _this.sendMessage(data.message, "success" ); } else { _this.sendMessage(data.message, "error" ); } }) .catch((Error { _this.sendMessage("请求失败!" , "error" ); }); },
发送消息的方法,记得引入ElementUI
1 2 3 4 5 6 7 sendMessage (messageContent, messageType ) this .$message({ message : messageContent, type : messageType, }); },
然后就是后台接收(如果是SSM项目,在SpringMVC配置文件中配置Bean
如果是SpringBoot项目,记得在application.properties中配置:
见上方内容
接下来,我们写后台的具体上传方法。
1 2 3 4 5 6 7 8 9 10 11 12 13 14 15 16 17 18 19 20 21 22 23 24 25 26 27 28 29 30 31 32 33 34 35 36 37 38 39 40 41 42 43 44 45 46 47 48 49 50 51 52 53 54 55 56 57 private static final String UPLOAD_DIRECTORY = "upload" ; @PostMapping(value = "/uploading") @ResponseBody public TSMResult uploadFile (@RequestParam("file") MultipartFile file, HttpServletRequest request, TSMResult tsmResult) if (file.isEmpty()) { tsmResult.setData(0 ); tsmResult.setMessage("文件不可为空!" ); return tsmResult; } String fileName = file.getOriginalFilename(); String templatePath = request.getServletContext().getRealPath("./" ) + File.separator + UPLOAD_DIRECTORY; System.out.println("文件路径:" + templatePath); String suffixName = fileName.substring(fileName.lastIndexOf("." )); String prefixName = fileName.substring(0 , fileName.lastIndexOf("." )); File dest0 = new File(templatePath); File dest = new File(dest0, fileName); try { if (!dest0.getParentFile().exists()) { dest0.getParentFile().mkdirs(); } if (!dest.exists()) { dest.mkdirs(); } file.transferTo(dest); String filePathSaved = templatePath + File.separator; teacherServer.saveFilePath(filePathSaved, fileName); tsmResult.setData(1 ); tsmResult.setMessage("文件上传成功!" ); return tsmResult; } catch (Exception e) { tsmResult.setData(0 ); tsmResult.setMessage("服务器错误,请稍后再试!" ); return tsmResult; } }
1 teacherServer.saveFilePath(filePathSaved, fileName);
这个代表,我们将这个上传的文件名字,以及对应的上传路径,写进数据库中 。
对应服务层代码:
1 2 3 4 public int saveFilePath (String filePathSaved, String fileName) return sourceMapper.saveFilePath(filePathSaved, fileName); }
对应mapper代码:
1 2 3 @Insert("insert into source(source, papername) values (#{filePath},#{fileName})") int saveFilePath (@Param("filePath") String filePath, @Param("fileName") String fileName)
可以建立一个Source实体类,引入Lombok
1 2 3 private Integer id;private String filePath;private String fileName;
并且数据库也建立一个source表,其中字段名与这个Source实体类的属性名一模一样(避免Mybatis的字段映射ResultMap)
# 在实现文件的上传后,我们肯定会有相应的下载功能。
即从上传目录中的文件中,去下载对应的文件。
前端页面动态生成一个锚点(Bootstrap可加上按钮样式类)1 2 3 4 5 6 7 8 9 10 11 var list = result.data.list$.each(list, function (index, item ) var papername = item.papername var download = $("<a></a>" ).addClass(papername + " btn btn-danger btn-sm" ).append($("<span></span>" ).addClass("glyphicon glyphicon-download" )).append("下载" ).attr("href" , "/DownloadServlet?paperName=" + item.papername); });
注意到,我们这里的路径是:/DownloadServlet?paperName=xxx
因此,我们肯定是以get的请求方式
后台controller层代码1 2 3 4 5 6 7 8 9 10 11 12 13 14 15 16 17 18 19 private static final String UPLOAD_DIRECTORY = "upload" ;@RequestMapping(value = "/DownloadServlet") public ResponseEntity<byte []> fileDownload( HttpServletRequest request, @RequestParam("paperName") String fileName, Model model) throws Exception { fileName = new String(fileName.getBytes("ISO-8859-1" ), "UTF-8" ); fileName = fileName + ".doc" ; String filePath = request.getServletContext().getRealPath("./" ) + File.separator + UPLOAD_DIRECTORY + "\\" + fileName; File file = new File(filePath); HttpHeaders headers = new HttpHeaders(); String downloadFile = new String(fileName.getBytes("utf-8" ), "iso-8859-1" ); headers.setContentDispositionFormData("attachment" , downloadFile); headers.setContentType(MediaType.APPLICATION_OCTET_STREAM); return new ResponseEntity<byte []>(FileUtils.readFileToByteArray(file), headers, HttpStatus.CREATED); }
其实,上述代码是不够完整的,因为如果数据库中没有这个以.doc为后缀(后缀写死了)的文件,就会报错。
因此,我们需要在前端下载之前就进行一次查询:
如果该文件的文件名存到数据库里了,才给予下载(即才动态添加下载的锚点样式)
完整代码:写在$.each遍历中:1 2 3 4 5 6 7 8 9 10 11 12 13 14 15 16 17 18 19 20 21 22 23 24 25 26 27 28 29 30 var list = result.data.list$.each(list, function (index, item ) var papername = item.papername var download = $("<a></a>" ).addClass(papername + " btn btn-danger btn-sm" ).append($("<span></span>" ).addClass("glyphicon glyphicon-download" )).append("下载" ).attr("href" , "/DownloadServlet?paperName=" + item.papername); $.ajax({ url : "isExistsFilename" , data : {"paperName" : item.papername}, type : "GET" , dataType : "JSON" , success : function (result ) if (result.data == false ){ $("." + item.papername).remove(); } }, error : function (error ) console .log(error) } }); });
查询的控制层代码:
1 2 3 4 5 6 7 8 9 10 11 12 13 14 15 16 17 @RequestMapping(value = "/isExistsFilename", method = RequestMethod.GET) @ResponseBody public TSMResult isExistsFilename ( @RequestParam("paperName") String paperName) Boolean isExists = false ; try { paperName = new String(paperName.getBytes("ISO-8859-1" ), "UTF-8" ); paperName = paperName + ".doc" ; Source source = adminServer.isExistsPaperFile(paperName); isExists = (source == null ) ? false : true ; } catch (Exception e) { System.out.println("检测到异常!" ); e.printStackTrace(); } return new TSMResult(200 , "查询成功" , isExists); }
从代码中的三目运算符可以看出:
1 isExists = (source == null ) ? false : true ;
服务层代码:
1 2 3 public Source isExistsPaperFile (String paperName) return sourceMapper.selectPaperFile(paperName); }
具体Source类看上方代码即可。
Mapper代码:
1 2 @Select("select* from source where papername = #{paperName}") Source selectPaperFile (@Param("paperName") String paperName) ;
我们希望在弹出消息或者通知(Notify)时
提示用户更改信息成功
这个提示类型是success类型
只需调用:
1 this .$sendMessage('这是消息内容' , 'info/success/error/warning' )
info 是灰色 success是绿色 error是红色 warning是黄色
注意,这里有一个知识点:对于默认导出的函数,使用时函数名外不需要{xxx}
即直接: import XXX from ‘xxx/xxx’
而如果有多个函数,想要按需引入的话,需要加上{}
按需引入(包括默认导出函数):
1 import { fun1, fun2 } from 'xxx/xxx'
1 2 3 4 5 6 7 8 9 10 11 12 13 export function sendMessage (messageContent, messageType ) this .$message({ message : messageContent, type : messageType, }); } export function alertTest ( alert('这是测试方法!' ) } export default sendMessage
1 2 3 import { sendMessage,loadingAnimation } from './assets/js/utils' Vue.prototype.$sendMessage = sendMessage Vue.prototype.$alertTest = alertTest
这样我们就可以,直接在vue项目中:使用this.$sendMessage来使用相应方法了。
1 2 3 <link rel ="stylesheet" href ="https://unpkg.com/element-ui/lib/theme-chalk/index.css" > <script src ="https://unpkg.com/vue/dist/vue.js" > </script > <script src ="https://unpkg.com/element-ui/lib/index.js" > </script >
页面非body标签 标记
vue挂载上去(可以使用template写HTML页面 如果已经有内容了就去掉template )1 2 3 4 5 6 7 8 9 10 11 12 13 14 15 16 17 new Vue({ el : '#app' , data ( return { } }, methods : { }, created ( }, mounted ( } })